Setting up HiveOS on ESXi 6.7 guest using GPU passthrough

This guide is to give a quick overview on how to setup HiveOS on ESXi 6.7 using PCI passthrough to setup a GPU. This guide assumes that you have an ESXi 6.7 (or higher) setup working. In this case I have the limitation of using vmklinux driver to power up my AMD Ryzen setup, so I cannot upgrade to ESXi 7 without acquiring a new NIC.

Also, this test was done only with a ZOTAC RTX 3070 but all the cards should work exactly the same way. Not sure about PCI passthrough limitations on VMware but in this case it’s only one GPU, so YMMV. I’m using the free version.

This guide is specific to the deployment of HiveOS, however this can be leveraged for other workloads that you might want to virtualize such as Tensorflow. This won’t cover GPU performance tuning, underclocking, etc. as I don’t have the proper experience with HiveOS and mining. No performance should be lost using DirectPath I/O but I’m unsure if this actually true as I didn’t test this device on a non virtualized environment (yet!). However, seems like common consensus about this card is around the same output as the one I’m getting (61.90 MH/s).

Step 1:  Download HiveOS
Once you download it the format will be on an .img file and you’ll need to convert it to VMDK. I used Starwind V2V converter for this task.

After converting it I had an issue after I tried to attach it to a VM, so I had to clone the disk inside of ESXi to make it work. (I also tried to upload it from VMware Workstation without success).

For doing this, upload the .vmdk file to your datastore and enable SSH on your ESXi host.

Syntax:

vmkfstools -i /vmfs/volumes/datastore/filename.vmdk /vmfs/volumes/datastore/newfilename.vmdk

Example:

[root@homelab:~] vmkfstools -i /vmfs/volumes/datastore-hdd-1/hiveos1/[email protected] /vmfs/volumes
/datastore-hdd-1/hiveos/hiveos.vmdk

Once this is completed after few minutes depending on your SSD/HDD, the clone will finish and you should be able to assign this drive to a VM HD.

Step 2: Setup your PCI device as passthrough
Make sure that your passthrough status looks as active. If its inactive, click on the upper button “Toggle passthrough”.

This step requires a reboot of the ESXi host.

Step 3: Customize your VM

First, expand memory and check the Reserve all guest memory (all locked) option.

Assign the PCI devices to the VM. Not sure if the sound is required (best guess is not) but I added it anyway.

Click on Add other device -> PCI device a couple of times and then assign both devices that come from your NVIDIA GPU.

After this, go to VM options -> Advanced -> Edit configuration and make sure this settings are in place (or set them if not).

svga.guestBackedPrimaryAware = TRUE
svga.present = TRUE
hypervisor.cpuid.v0 = "FALSE"

Please note that if any of this settings is not in place (specially the last one), the VM won’t be able to utilize the CUDA cores as it will complain about “invalid device ordinal”.

Step 4: Setup HiveOS

You should be all set to boot  your VM and do a regular HiveOS install. You need to go to HiveOS website and create a worker, you’ll acquire a worker ID and password which you need to setup on your VM.

After that you need to create a “Flight Sheet” if you don’t have one already. Personally I used PhoenixMiner as Ethminer pool wasn’t working at the time I wrote this guide.

This should be how it looks like after:

Now you can overclock as you like, without any modification it was doing 51 MH/s (having a 214w consumption) in average, after a little bit of tweaking and trying to be more efficient, I was able to get an average of 61.90 MH/s (125w consumption). But with this YMMV.

As always, feel free to reach out in case you have any question regarding this setup and I’ll try to answer.

Learning SAP – Part #1 – Installing ABAP on RHEL8

Lately I been sorta involved on doing things related to SAP so I thought it would be a great idea to try to setup ABAP at the home lab and test it out.

Full disclosure, I don’t have an actual clue of what’s going on and what I’ll do with this but I thought it was a good idea to try to learn. I’ll do follow up posts to go deeper into it (if I don’t get distracted with something else).

For this specific deployment my environment is the following:

  • VMware ESXi 6.7.0
  • Red Hat Enterprise Linux 8.3
  • SAP NetWeaver AS ABAP Developer Edition 7.52 SP04
  • VM sizing it’s 4 vCPU’s and 8GB RAM, 100GB partition for the whole OS.

Step 1: Get your OS deployed and updated.
This part it’s very straight-forward, go to developers.redhat.com and get yourself a free subscription for it. I did a minimal installation on it, subscribed and ran a yum update. (reboot!).

Once it’s deployed, you’ll require rpmfusion non-free (or download unrar from rarlab.com) as this is not providen by Red Hat or EPEL.

yum install libaio tcsh uuid libnsl

Also SAP has a requirement on UUIDD to be able to sort out your license properly, so it’s recommended to install it. However, this package is not available without a valid Red Hat for SAP subscription. You are able to get it from CentOS, I found it on rpmfind.

As this is just for testing, I won’t go too deep into how to setup the filesystems, but base requirements according to the documentation included in the binaries. If you require this on separate partitions, do it in advance.

File system recommendation
/sapmnt ~2GB
/sybase ~50GB
/usr/sap ~3G

My setup
/ 70G
/home 30G

Be sure of having your hostname on /etc/hosts as not having it will have you on a situation where no profile is found. (if this happen, just su to npladm and run startsap ALL manually after fixing it).

Step 2: Configure firewalld

You can skip this if you have firewalld disabled.

By default RHEL8 comes with firewalld using public as the default zone (see your zone executing firewalld --get-default-zone). Modify this while adding the service if you have a different setup.

# firewall-cmd --permanent --new-service=sapnpl
# firewall-cmd --permanent --service=sapnpl --add-port=3200/tcp
# firewall-cmd --reload
# firewall-cmd --permanent --zone=public --add-service=sapnpl
# firewall-cmd --reload

At this point, everything should be setup for you being able to open your SAP instance from SAP Logon on the St

Step 3: Go to developers.sap.com and create an account there for being able to download the trial versions of their products;

Step 4: Download ABAP, the version I’m downloading it’s 11 parts of about 13.5G total. You also need to download the license for it;

Step 5: Upload the SAP install to your VM. For this setup I will use /opt/sapmedia and use unrar to extract all of your files.

Be sure of having your license there as well.

ABAP files

Remove this files BEFORE running the installer! As it will continue to extract more files and you might run out of space.

Step 6: Run the SAP ABAP installer.

chmod +x install.sh
./install.sh

If all the dependencies were there, it should show you the SAP license agreement and ask you for the OS users that are going to be setup.

It will take a while here, so go grab a snack while that happens. By a while, I mean that you can actually go to the store to get the snack and begin next step once you’re back.

Step 7: Install the SAP Logon (I did install 760) on the client.

Step 8: Configure the system entry on SAP Logon and login.

Fill this up with the application server IP / DNS that your computer can resolve back to your server.

SAP profile
SAP profile setup

Once that’s done, login using the default passwords which you can find on /opt/sapmedia/index.html (if you extracted the files at /opt/sapmedia)

SAP Login
SAP Login as DEVELOPER

You can do the same as SAP* or DDIC . Default password for those two accounts is Down1oad.

Step 9: Setup SAP as systemd unit (optional)

By itself, the installer setup sapinit on init.d. However this doesn’t handle the start/stop of your SAP instance.

Some basic commands before we start setting up the systemd unit, so become doing # su - npladm (or login using the master password that was setup during the deployment).

At this point, if you restart the server the application won’t come up by itself, unless you start it manually.

Below the commands for checking the status of your ABAP instance, start and stop.

Using startsap/stopsap (deprecated)

$ startsap ALL
$ startsap check
$ stopsap ALL

Using sapcontrol

$ sapcontrol -nr 0 -function GetProcessList
$ sapcontrol -nr 0 -function StartSystem
$ sapcontrol -nr 0 -function StopSystem

Now we will create few files to make the systemd service, and yeah, there are way better ways to do this with systemd so I hope to hear back from you on the comments! Get as fancy as you can.

/usr/sap/NPL/nplstart.csh

#!/bin/csh
/usr/sap/NPL/SYS/exe/uc/linuxx86_64/sapcontrol -nr 0 -function StartSystem

/usr/sap/NPL/nplstop.csh

#!/bin/csh
/usr/sap/NPL/SYS/exe/uc/linuxx86_64/sapcontrol -nr 0 -function StartSystem

And finally, the service file at /etc/systemd/system/sapnpl.service

[Unit]
Description=sapnpl
After=sapinit.service multi-user.target
Requires=user.slice

[Service]
KillMode=none
Type=oneshot
User=npladm
Group=sapsys
ExecStart="/usr/sap/NPL/nplstart.csh"
ExecStop="/usr/sap/NPL/nplstop.csh"
RemainAfterExit=yes

[Install]
WantedBy=multi-user.target

and let’s make the first 2 files executables and give the ownership to npladm:sapsys

chown npladm:sapsys /usr/sap/NPL/nplstart.csh /usr/sap/NPL/nplstop.csh
chmod +x /usr/sap/NPL/nplstart.csh /usr/sap/NPL/nplstop.csh

Now you should be able to enable/start/stop the service. From this point and on, try not to mess around doing that not using systemd.

Below are the commands to deal with this:

$ systemctl enable --now sapnpl
$ systemctl status sapnpl
$ systemctl start sapnpl
$ systemctl stop sapnpl

The status will look like this

systemctl status sapnpl output

As I mentioned before, not really sure on what I’m trying to achieve or what I’ll do next with it and I’ll try to do a follow up on this soon.

Convert to RHEL from CentOS using Convert2RHEL

Hi everyone – It’s been a while since my last post and basically my situation is the following ben using CentOS 7 for a while at home and at some point on 2020 I did upgrade to CentOS 8 which probably I should have done a post about it is a more complex activity but well, I didn’t (yet).

Given the recent news of CentOS not following their standard cadence and moving away from what enterprise Linux is to CentOS Stream, you might want to move some workloads from CentOS to something with long-term support.

As you might know if you’re here, that includes Oracle Linux and the upcoming Rocky Linux (which first release is expected by end of March 2021) for some sort of easy conversion without re-deployment. Ubuntu is also trying to push new users towards their platform but that’s a bigger leap, specially for enterprise or to users that are not familiar with Debian derivatives.

Before doing any of this, please have the following considerations:

  • Convert2RHEL is currently unsupported by Red Hat;
  • Conversion on UEFI systems is not officially supported as there is an open bug on it, but I do address how to prevent (or how to fix) the issue below.
  • This should work on CentOS 6 as well, but this is something I did not test and as it is EOL, I won’t address it here.
  • Having a working backup of the server and that you have the means to restore it. Personally, I use ESXi so I’ll just take an snapshot;
  • Having a valid Red Hat subscriptions. You can obtain a free one thru the developer program here. They offer 16 VM’s which should be sufficient for most of home lab environments.
  • Perform a yum/dnf update to latest version before starting.
For CentOS 8:
# dnf install -y https://github.com/oamg/convert2rhel/releases/download/v0.17/convert2rhel-0.17-1.el8.noarch.rpm

For CentOS 7:
# dnf install -y https://github.com/oamg/convert2rhel/releases/download/v0.17/convert2rhel-0.17-1.el7.noarch.rpm

Initialize conversion:
# convert2rhel --username your_RHSM_account

At this point you’ll be asked to accept the EULA and to confirm a few times about moving forward with the conversion until you’re asked about your RHSM information and you need to select the subscription number which you want to utilize for this (it means the number on top of the subscription information, this is not the pool id!).

Once the conversion finishes, DO NOT REBOOT if you are on a UEFI system, as you’ll likely encounter (at the time of writing) the bug #1898314. (If you got to this article because you got an issue booting after it and landing on grub, don’t worry, I got you.)

If you didn’t reboot, great! You are in time to fix grub and be on your way to boot your system properly.

Step 1: Generate a grub2-mkconfig by doing

# grub2-mkconfig -o /boot/efi/EFI/redhat/grub.cfg


Step 2: Delete the CentOS entry from efibootmgr

# efibootmgr -v


Now we need to delete the entry for CentOS Linux, in this case Boot004. You need to know the boot disk and partition (/boot/efi) for the following steps. (In my case it is on /dev/sda1). Change the release to 7 or 8 depending on what OS you use.

# efibootmgr -Bb 0003
# efibootmgr -c -d /dev/sda -p 1 -l \\EFI\redhat\shimx64.efi -L "Red Hat Enterprise Linux <version>"

At this point you should be having a working environment! Congratulations.

But if you did the same mistake I did… and here we are and rebooted right away after the conversion to find a grub> screen, this is because UEFI conversions are not supported. Basically you have two choices at this point:

  1. Fix it;
  2. Go back to snapshot/backup and re-do it.

If you go for the fix it way, you’ll need a CentOS or Red Hat disk/ISO and go to recovery mode. Once you are chrooted into /sysroot, you can go back to step 1 on how to fix it before rebooting and get it done. Once you’re done, exit the chroot environment and recovery mode and you should be able to login to your Red Hat installation if your upgrade was successful.

Personally I have done few of this upgrades and I haven’t encountered any major issue. Feel free to comment on your own experiences or ask any question below on the comment section.

Good luck!

Reference: redhat.com

Configuring a trunk network without native VLAN on Ubuntu

I had to deal with systemd nonsense today because I’m trying to deploy something cool under Ubuntu. Usually I don’t have to deal with systemd so I thought it may be worth documenting for me to remember.

So, first of all. Doing the first attempt on-the-fly to know networking actually works. In this case I will use vconfig to create the vlan interface, ip for adding the address to the new device and route for the gateway.

For this example I want to use the interface enp9s0f1, the VLAN 205, as IP address I want 10.200.205.22 and my gateway is 10.200.205.254.

# vconfig add enp9s0f1 205
# ip addr add 10.200.205.22/24 dev enp9s0f1.205
# route add default gw 10.200.205.254
# ip link set dev enp9s0f1 up
# ip link set dev enp9s0f1.205 up

Once this is done, you should be able to reach the server thru the network. You might want to setup your DNS too, go to resolved configuration and add the following lines (or modify if already there).

/etc/systemd/resolved.conf

[Resolve]
DNS=8.8.8.8
FallbackDNS=8.8.4.4

Restart systemd-resolved by doing systemctl restart systemd-resolved. Once everything works as it should time to make it persistent.

Go to /etc/systemd/network and you will have to create 3 files. One for the carrier and two for the VLAN interface.

/etc/systemd/network/enp9s0f1.network

[Match]
Name=enp9s0f1

[Network]
VLAN=enp9s0f1.205

Once we specify that we will use a VLAN using enp9s0f1.205 device, we will create enp9s0f1.205.netdev and enp9s0f1.205.network to configure that interface as it should. netdev will specify that it is a VLAN and the ID while the network file will provide the static configuration of the address.

/etc/systemd/network/enp9s0f1.205.netdev

[NetDev]
Name=enp9s0f1.205
Kind=vlan

[VLAN]
Id=205

/etc/systemd/network/enp9s0f1.205.network

[Match]
Name=enp9s0f1.205

[Network]
Description=”VLAN 205″
Address=10.200.205.22/24
Gateway=10.200.205.254

After doing this make sure to have systemd-networkd and systemd-resolved enabled for next boot (systemctl enable …), perform a reboot and everything should be good to go :).

And well this was my first and not pleasant approach to systemd-networkd and systemd-resolved and so far I hated how they work.

If you know a better way to fulfill this, feel free to leave a comment!

Gear talk: From old-school to the future.

As some of my fellow readers know and a guitar aficionado, I been playing for a time now and although I don’t play very well I appreciate when my setup screams as exactly as I want. That’s exactly what I found on a Randall Diavlo RD45H coupled with my Gibson Explorer a couple of years ago.

Sadly, I had to move from a house to an apartment that cannot handle that beast. So I looked up which are alternatives that would allow me to have a huge variety of sounds while using headphones and being cheap.

The gadgets
I narrowed my search to 2 gadgets: POD HD500X and the Eleven Rack. Being that said I looked up reviews, hear few clips on YouTube and looked up how active the scene of making new presets, the choice was easy once I took all of that. Also got a Beyerdynamic DT 990 Pro 250 ohm for it.

The Axe

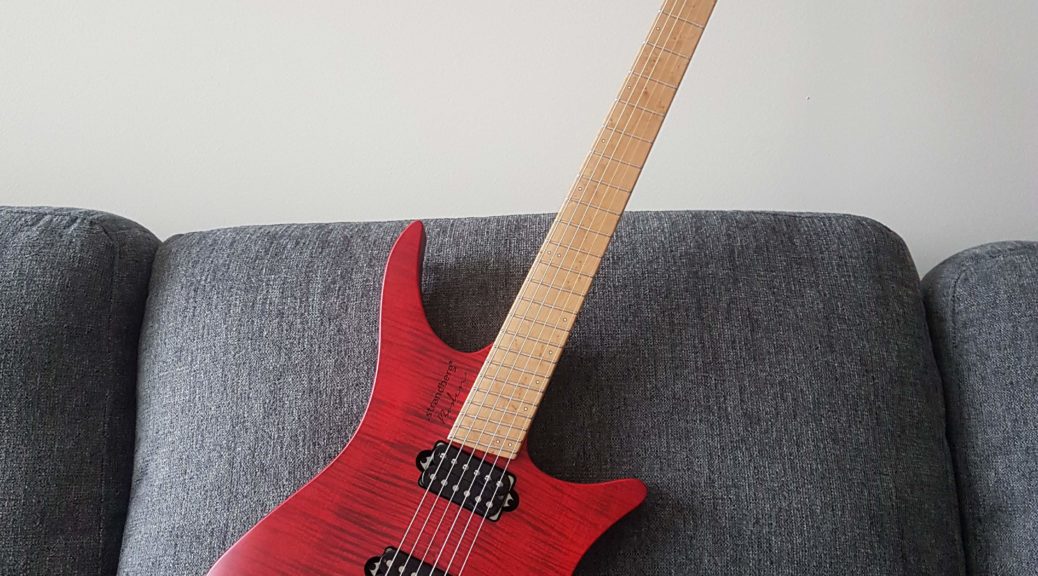
Strandberg Boden 6

The hardest part was to pick the right axe, moving away from an Explorer paired with an 81/85 EMG pickups is not easy, still, I have it but is hard to travel with. For this, the requirement was easier than with the interface: something portable and amazing.


Got a Strandberg Boden 6 with Suhr passive pickups that sounds better than how it looks, is super lightweight and it comes with the EndurNeck, which basically is kinda weird as it is not flat but round and the shape changes thru the neck. Also, headless guitars are gorgeous.

Result
Now that I have everything setup I must say that I miss the tubes. The interface is great, does all I expected it to do but doesn’t sound as right as I wish but allows me to be more flexible on what to play which is also great!

About the guitar, I cannot describe how well it plays. The electronics are very quiet, no noise, no fret buzz, can be played on all the positions while being comfortable at the same time, it includes a gig bag which is very convenient as you can use it as a backpack, which I hope that is able to go in a plane cabin.

An immigrant voyage – Part I

A few months ago I had a job offer which involved a relocation to the United States for few years. So I took it right away. However, I didn’t know at the moment what I was getting into when it comes to complexities (and expenses) that come with it.


I had the fortune that a friend (and coworker) was able to provide me housing for the first couple of months to settle in while I looked for an apartment and a car.

It was Colombus day and I wanted to get my SSN paperwork done. The day I arrived I looked up my i-94 form, which I noticed was filled with an incorrect kind of visa in the system but correctly on my passport, this is a requirement to proceed with the request but anyway I showed up at social security administration office which was closed.

So I went to USCIS at Detroit, which I did and they told me there is nothing they could do that as it’s a Homeland Security matter, so my first guess was to return to the airport and try to get it fixed right away which I would think its a basic procedure as I saw a note in the waiting room about it and how to get it fixed by just sending an email with a copy of the stamp and my visa. Went to my future workplace to ask for a scanner and I did send the requested information, immediately I got an auto-response that said: “Responses can take up to 6 weeks so please do not call or send another email.”. I was starting my new position in 2 weeks.

Day 2 – Showed up at Social Security Administration office to try my luck but I couldn’t do the request due to the issue with the i-94.
It seemed that the only way to get the form fixed right away was to leave the country and come in again and so I did. Went to Windsor, ON (Canada) by crossing the tunnel from Detroit downtown. I was there for around an hour and came back to Detroit, explained the whole thing at the immigration office and they issued a new form and that’s pretty much how I got a was able to complete my paperwork without waiting 6 weeks. This time I asked for a physical one rather than depending on the online one. The best part of all, I was able to go back and finish my paperwork before the office closed.

Sadly I didn’t take a photo of anything for this post so I will just dropped a photo that I took at an airport.

#F1ESTA

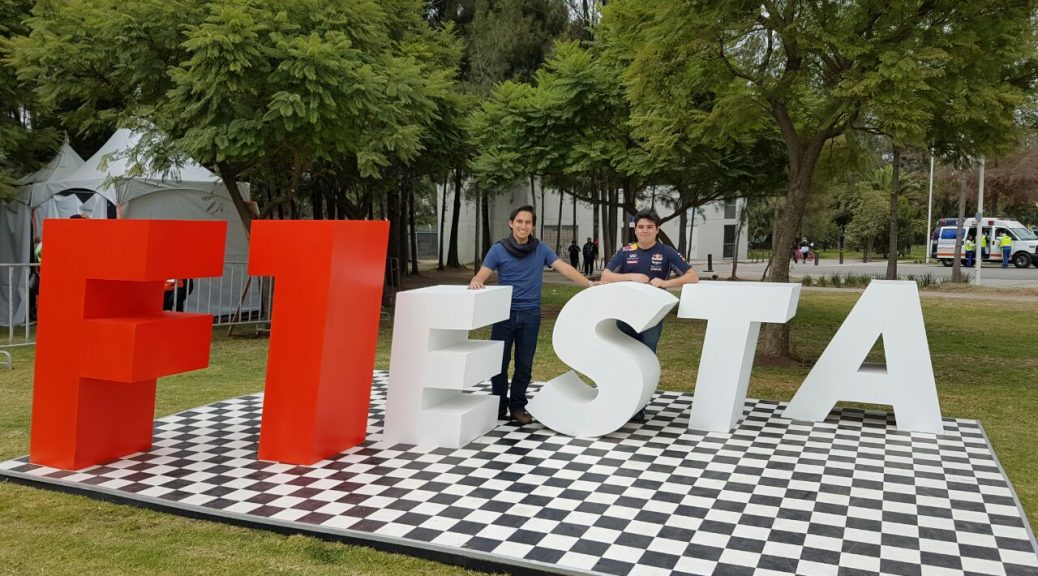
It has been 5 years since I’ve started to follow this beautiful motorsport, the F1. A year has passed since the last Mexico GP and now it’s back to bring the fans beautiful sounds of fuel combusting inside the motors, the particular smell of burning tires drawing patterns over the asphalt, the sparks flying from the brakes, and of course the roar of the fans cheering for their favorite drivers (which mostly was for Esteban Gutierrez and Sergio Pérez as we had the fortune of having to Mexican drivers on the track).

I arrived in Mexico City on Thursday evening and had a delicious bagels for dinner and a restful night of sleep in preparation for a long next day. I was looking forward to attending the early morning practices and taking some photos before the full excitement of the main event in the following days called #F1ESTA, which means “party” in Spanish.

Day 1

The start of the day was slow. I didn’t think that many people would be there for the practices. I started to see people wearing gray, red and blue in the Mexico City subway. As I was getting closer to the racetrack Hermanos Rodríguez, I could feel the excitement growing within me; it was the first time that I was going to see and listen to an F1 car on the track. I arrived at the venue with a friend and started to look for our designated entrance gate. Being a couple hours early before the practices, we had a ton of time to look around for merchandise, drink a cup of coffee to warm ourselves in the chilly morning and took few photos—I knew it would be almost impossible to do so on the weekend.

There were some staff people distributing earplugs to the fans.  However, I came to get my ears destroyed—I mean it couldn’t be worse than standing next to a big speaker in a concert. Practices started and we had the fortune of seeing many cars taking part of it.

There were some staff people distributing earplugs to the fans.  However, I came to get my ears destroyed—I mean it couldn’t be worse than standing next to a big speaker in a concert. Practices started and we had the fortune of seeing many cars taking part of it.

Day 2

I arrived to the racetrack to meet a friend for the qualifiers, before the last session of test practice started.  This time, the venue was packed full of fans!.The weather was great, which meant the track was hot, so I knew the qualifiers were going to be amazing. As much as I like rain, and even more, racing on water, it was my first time seeing the F1 in person so I wanted the to see the top speeds. I found that my seat was right on a DRS (Drag Reduction System) zone so that was a great surprise. I had bought the tickets as fast as possible to get a nice spot but didn’t realize how good it was until a day before.

After practices finished, historic classical cars started to race. Although their sound was amazing, the cars were slow compared to today’s cars. I started to look for a friend who traveled the whole way from Seattle to Mexico City that same morning to join the #F1ESTA. Upon finding him, we went for beer and tequila. The excitement in the air was incredible.

The qualifiers started which means that lap times were faster; I didn’t knew if was worth to turn my head when the cars passed right in front of us because it was impossible to follow them at their high speed.

When the qualifiers finished I knew that Sunday was going to be a day to remember for a lifetime. We left to get some rest, order for food and attended a Halloween party which we left early to be ready for the Mexico GP.

Day 3

Race start was at 1 PM. We took our time to sleep in and to have a mexican breakfast which included eggs and a lot of salsa before getting into the venue. Mexico City traffic was totally messed up due to the usual traffic and the amount of people getting close the racetrack. We were a couple miles away from the venue when we decided to continue walking as it was impossible to get nearby on a car. We took about 40 minutes walking the 2 miles to the venue, but we arrived at the incorrect gate so we had to make our way to the right one.

We arrived just in time to get a beer, meet up with another friend for a few minutes and to see planes drawing the colors of the Mexican flag in the sky.

First lap, Hamilton got out of the track and back inside, seconds after yellow flag and virtual safety car. Couple of laps with the safety car inside the track until the race restarted, the smell of the burning tires was very noticeable. People were yelling; commentators had an excited tone of voice. I was completely filled with joy being able to see and listen to the race and absorb the whole F1 experience in person.

http://farm6.staticflickr.com/5615/30445060560_68d2f34227_z_d.jpg

In the last couple of laps, my favorite 3 drivers (Verstappen, Vettel and Ricciardo) were fighting to get in the 3rd place points; each of them did actually, two of them for few time due to penalties performed right after the race and after the podium.!

I cannot stop describing how awesome this experience was. It was one of the best things I ever seen and I would recommend that everyone check out an F1 racing event even if you are not into cars or racing at all. You are not attending just for the race but  for the whole event which invites you to embrace the atmosphere and join the big party.

Heroes Of The Storm: One month playing a ‘MOBA’

Yeah, I know. Blizzard says that it is not a MOBA but a “Hero Brawler” even when we probably don’t know what it is just yet. I’ve never been a big fan of MOBAs although I played the mods at Starcraft and then Warcraft III, many time ago. The big odd of this kind of games is play with people that doesn’t know how to play its character or does a worst performance than the rest of the team resulting on a loss. Which also is an advantage when you do a proper team with your friends, which can be incredibly fun.

Blizzard DOTA

For this blog post I gonna start with some history of what a MOBA is and highlight which are the differences between Heroes Of The Storm and the rest of the other games that fall in the category of this genre. MOBAs are characterized for being a kind of game where two teams fight in teams to destroy other enemies with help of weak units that we call minions.

So we know now that MOBAs are based on Blizzard games, at least at the begin,  when IceFrog created his map at Warcraft III and got many attention, then Riot Games released League of Legends at 2009, the same year IceFrog was hired by Steam.

2010: Heroes of Newerth was released and Steam secured the rights for DotA: Allstars, also announced Dota 2.

blizzard-allstars

2012: Blizzard announced Blizzard DOTA, and got into a dispute with Steam for the rights, as they bought DotA-Allstars, LLC. But still Steam owned DOTA trademark and they changed the name to Blizzard Allstars and at last to Heroes Of The Storm.

There are other games in the business besides League of Legends, Heroes of Newerth and Dota 2, like Smite, but this are the most relevant ones.

Generic MOBA Map
Generic MOBA Map


Now lets talk about the specifics of Heroes of the Storm.

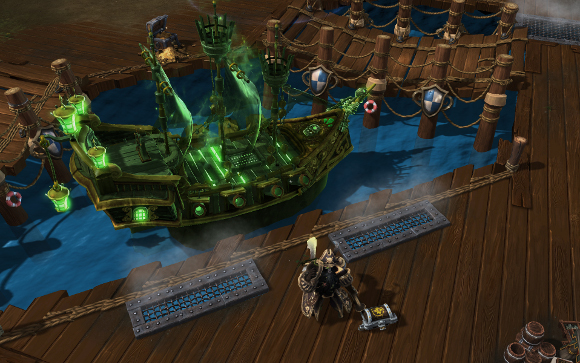
Here we can spot the first difference between Heroes Of The Storm with other MOBAs, some maps are not like this and don’t even share the same secondary objectives which is get mercenaries and use the map mechanics like coins, skulls, seeds depending on the map.

20140506052946a0ds192ej1csaazy

Talents instead of shop is an interesting thing to mention, in other games you can equip your character with all the stuff you need at the current game, to adapt the character to this exact game. But still, is a mess for a new player to know all the items, know which are the correct ones using a item shop that is way to big and that makes you lose time in-game.

The talents are granted at level 1, 4, 7, 10, 13, 16 and 20 (as far I can remember right now) and this ones can adapt your character to the current situation, increasing  healing, attack and powering other abilities. Bribes for the mercenaries too.

BlackHeartBay_00

As there is no store, there is no gold. So what the minions drop? Experience. The experience is not given to the last hit but to the player (team) that is closer to the dying minion. The level is for all the team, not individual. Some characters are better killing minions, other can stun big groups of other heroes and others which are good at hunting your enemies, almost always, is your choice using talents.

Another difference with another games like this is that is more team oriented as it encourages the players to stick and work together to get the objectives (mercenaries, pay for map mechanics, breaking walls).

The characters are some that the ones that play Blizzard games know, Jim Raynor and Kerrigan of Starcraft, Thrall and Arthas from World of Warcraft, Tyrael and Diablo of Diablo, this with a lot of other characters that will make the game more enjoyable.

After about 100 matches in this last 30 days I can say that I’m very excited about the game and it’s final release, my win ratio has been around 50% so is quiiiiite okay. I wish I could blame my team mates but well, it’s teamwork and it depends on everyone.

My favorite map is by far Cursed Hollow and Haunted Mines where the turn around is always a possibility using map mechanics and the character I been using the most is Jim Raynor. Sadly, I can’t play Hero league just yet as I need a couple more of Heroes but I’m hoping to play it later this week and get rid of bad players which no  experience at all. If anyone is interested on seeing this game, go ahead and look for streams at Twitch and if it happens that my channel is online, subscribe!

Heroes of the Storm

GG.

My top 5 TV shows

TV shows are a huge deal, at least for me. This is mainly because unlike the movies, the TV shows actually can tell a story in a detailed way giving the producers more resources to work with. Due to this, the viewer can know more about the characters and plot.

In my life I’ve watched many TV shows and from all of them, I want to highlight the ones that, at least for me, they were better than the any others.

5. House of Cards

house-of-cards
It is an adaptation of House of Cards that was a BBC mini-series and is based on a novel by Michael Dobbs. It is a political drama which tells the story of Frank Underwood, a democrat that will do everything to get himself into a position of power. The series show the manipulation and pragmatism performed by the main character which is portrayed by Kevin Spacey to accomplish his goals.

One particular thing about this series that they adopted from the BBC series is how Frank U. talks to the audience explaining all the eventualities.

Currently both seasons are available at Netflix and there is a third season coming out next year.

4. Sherlock

sherlock-bbc
Sherlock is a crime drama produced by Sue Vertue for the British television. This TV show tells the story of Sherlock Holmes and his flatmate Dr. Watson and how they solve various mysteries.

The performance of Benedict Cumberbatch and the quality of the filming makes the series very attractive. The adaptation done from the Sir Arthur Conan stories are awesome.

There are 3 seasons, each season have 3 long episodes.

3. Breaking Bad

Breaking Bad
This series tell the story of Walter White, portrayed by the actor Bryan Cranston. Mr. White is a chemistry teacher that once had lots of potential but due to some money issues he had to do some extra work at a car wash.

When he is diagnosed with lung cancer he does everything he can to leave money for his family. Searching an income of money he finds his real passion about cooking crystal meth and a long story develops from there.

The Sopranos has five seasons that are completely enjoyable. During the complete history you can see the transformation of a teacher into the biggest meth cook. There is a prequel in development.

2. The Sopranos

The Sopranos

This is another crime drama! The Sopranos tells the story about Anthony Soprano (James Gandolfini), a mobster of the Italian-American mob based in New Jersey. Tony is a character which has lots of conflicts with his criminal organisation and family duties. These issues are often mentioned during his visits to the psychiatrist.

Also it shows the rivalry with other criminal organisations and how he and his colleagues deal with this problems. This TV show was really well performed to the point where the viewer actually sympathizes with Tony and some other characters.

This show has been rated as the greatest TV shows ever. The Sopranos has 6 seasons and was recorded in a time length of 8 years. The performances of James Gandolfini, Michael Imperioli, Steven Van Zandt, Tony Sirico and Dominic Chianese makes this series superb. It is a really recommended TV show.

1. Game of Thrones

Game of Thrones

Game of Thrones is an adaptation of “A Song of Ice and Fire” created by George R.R. Martin. The story is based on Westeros and Essos which are fantasy locations. The show relates various plot lines which are about some noble houses that are involved in a war for the Iron Throne and the constant threat of war by the northern creatures (called “the Others”) against the living creatures.

I don’t really know how to describe this series without spoiling a chunk story but I can tell that if you like dragons, swords, war and medieval stuff this series will fill your expectations.

Season 4 just finished a couple of weeks ago and the last part of the novel is still unreleased. As any other HBO series the locations and characters are awesome.

George R.R. Martin is involved on the production of the series. Notable actors are Sean Bean and Peter Dinklane which are well known for previous works and several new actors.

So these are the five most awesome TV shows I’ve watched since I can remember. I would highly recommend  any of them. Most can be found at Netflix, Amazon Instant Video or HBO Go. If you know any other show that I haven’t mentioned and is worth watching let me know at the comments.

Recover files after shortcut USB-drive virus

Today I plugged my USB at school and noticed that I had a little but annoying virus that converted all my files into .lnk files. So when I came back home I plugged it to recover my files and format it but then I realised that Windows Defender put the virus in quarantine and made my files “invisible” (couldn’t see it even with show hidden files at Windows Explorer).

The good thing is that this can be easily fixed, but I don’t know if any common user actually knows how. So this is the main reason of this easy pie tutorial.

Open your My PC and see where your USB drive is located (or sdcard, whatever).

usb

Then, just open the Command Prompt and write this (change the drive letter to your own).

cmd

You should be able to see your files now, enjoy.